Admin Manual – Using the Security Operations Board
1. Overview
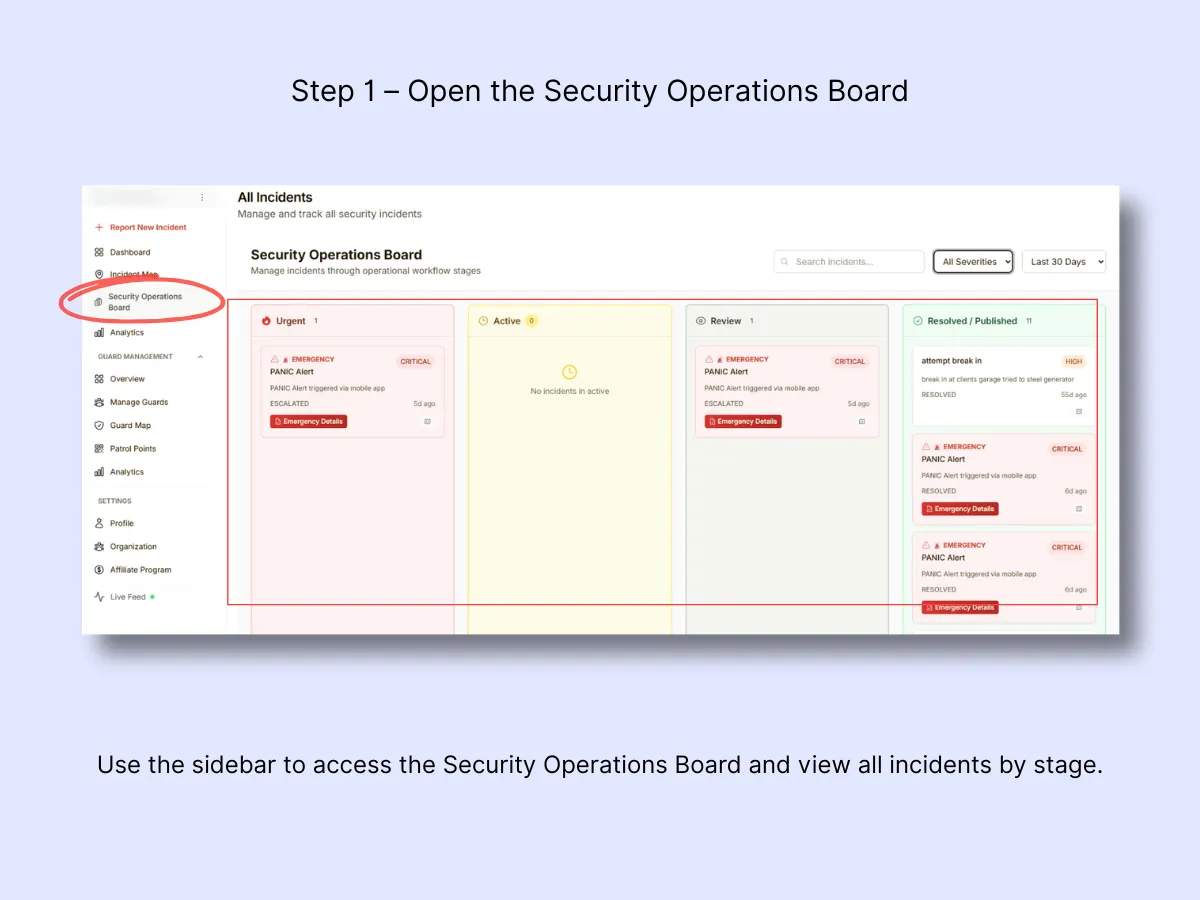
Located in the sidebar under "Security Operations Board."
The board is organized into four color-coded columns:
- Urgent (Red): Critical incidents or panic alerts requiring immediate action.
- Active (Yellow): Incidents currently being addressed by guards.
- Review (Blue): Incidents pending admin verification or additional notes.
- Resolved / Published (Green): Finalized incidents that have been verified or shared with clients.
2. What You're Seeing
Each column contains incident cards displaying:
- Title, Type, and Severity (Low / Medium / High / Critical)
- Time reported and status
- Quick actions like Emergency Details (for panic alerts)
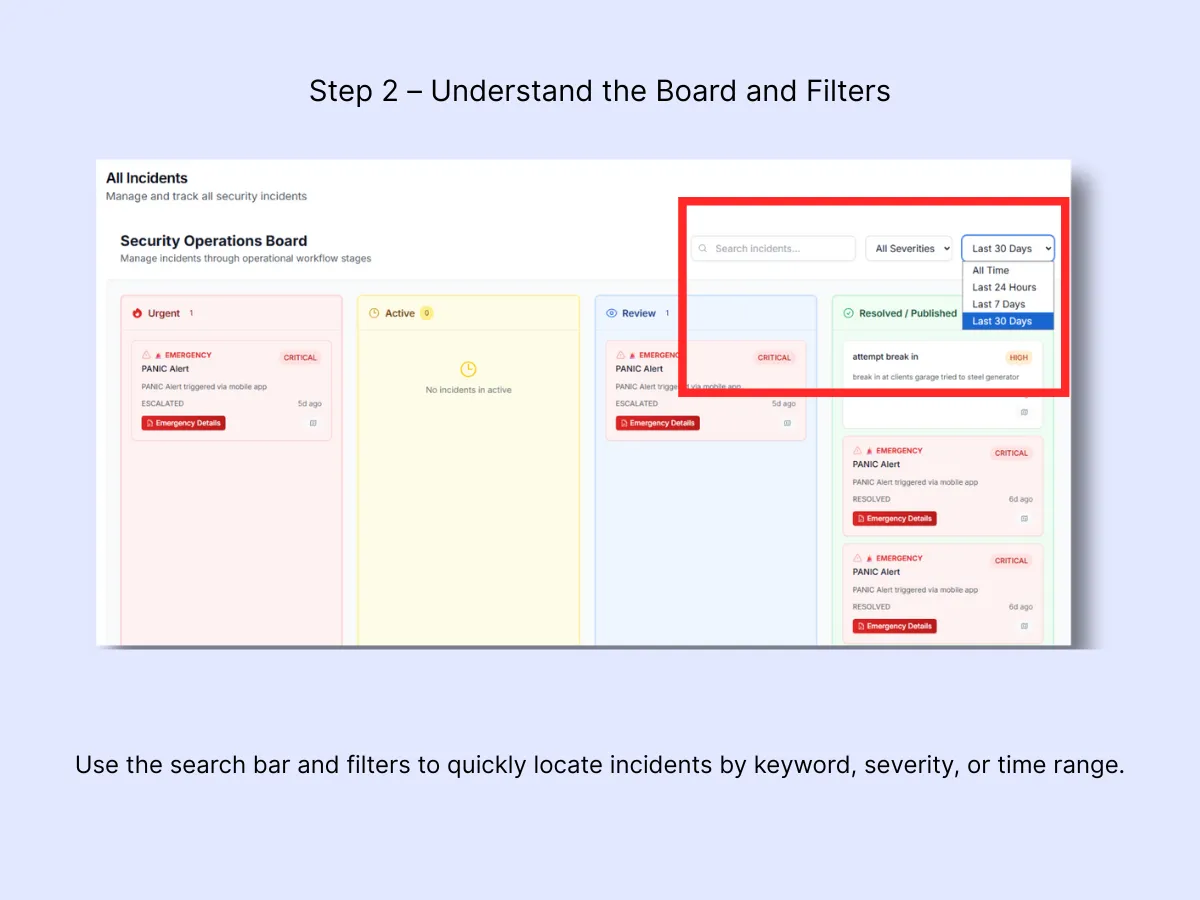
The top-right tools allow you to:
- Search by title or keyword.
- Filter by Severity or Time Range (24 hours, 7 days, 30 days, or All Time).
3. Daily Use – Step by Step
A. Open the Board
In the sidebar, select Security Operations Board to view all current incidents.
B. Set Your View
Apply your preferred filters:
- All Severities and Last 30 Days for a comprehensive overview.
- Narrow the scope when concentrating on a particular site or day.
C. Scan Columns Left to Right
Begin with Urgent → proceed through Active, Review, and Resolved / Published.
- Urgent: Address these first. These are critical incidents or panic alerts.
- Active: Incidents that guards are currently handling.
- Review: Verify and finalize the details submitted by guards.
- Resolved / Published: Closed cases or those shared with clients.

4. Managing Incidents
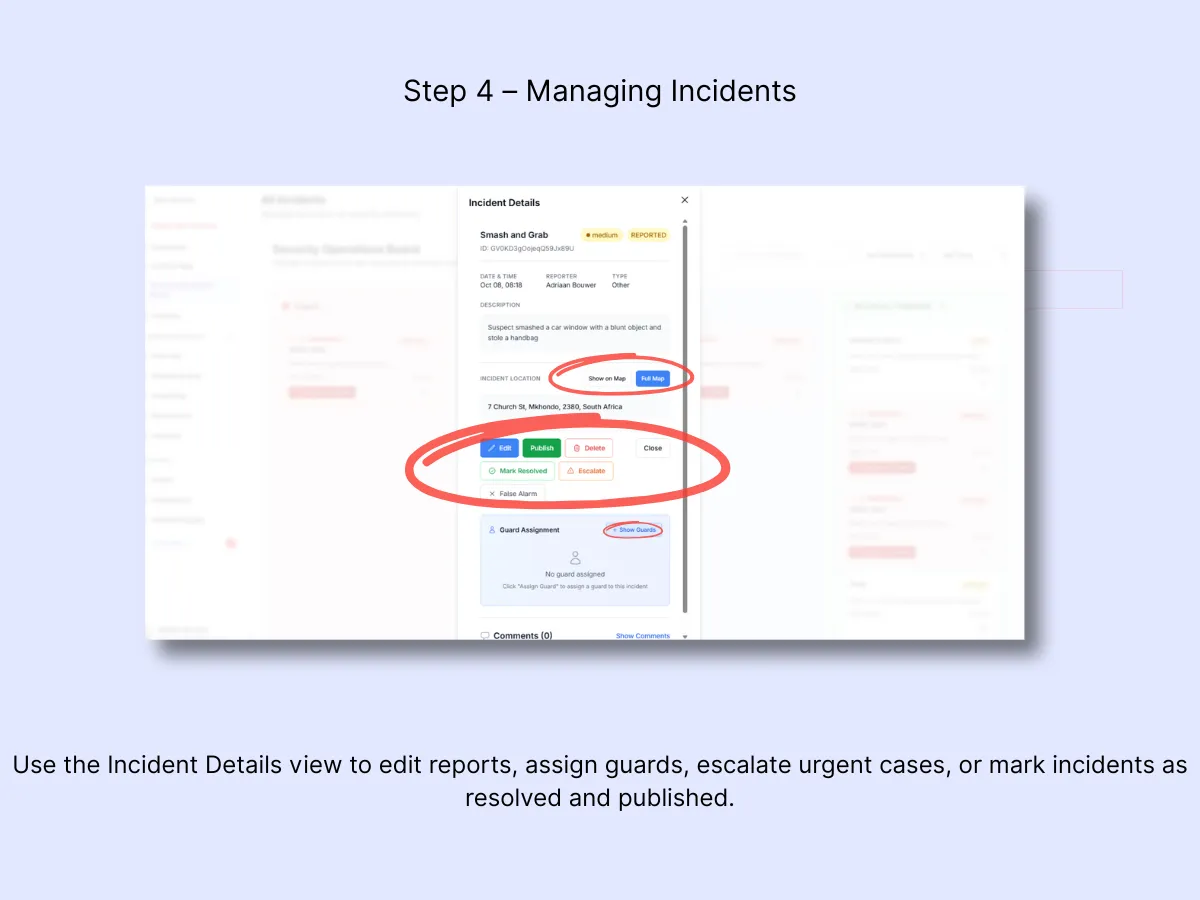
A. Open a Card
Select any card to open Incident Details. From this panel you can:
- Edit: Modify details such as type, severity, or location.
- Assign Guard: Connect the closest available guard to the incident.
- Mark Resolved: Close the report once it is complete.
- Escalate: Move the case to Urgent if conditions deteriorate.
- Publish: Make the incident accessible in the Client Portal.
- All Emergency Details: Review device status, GPS accuracy, and trigger timeline (panic alerts only).
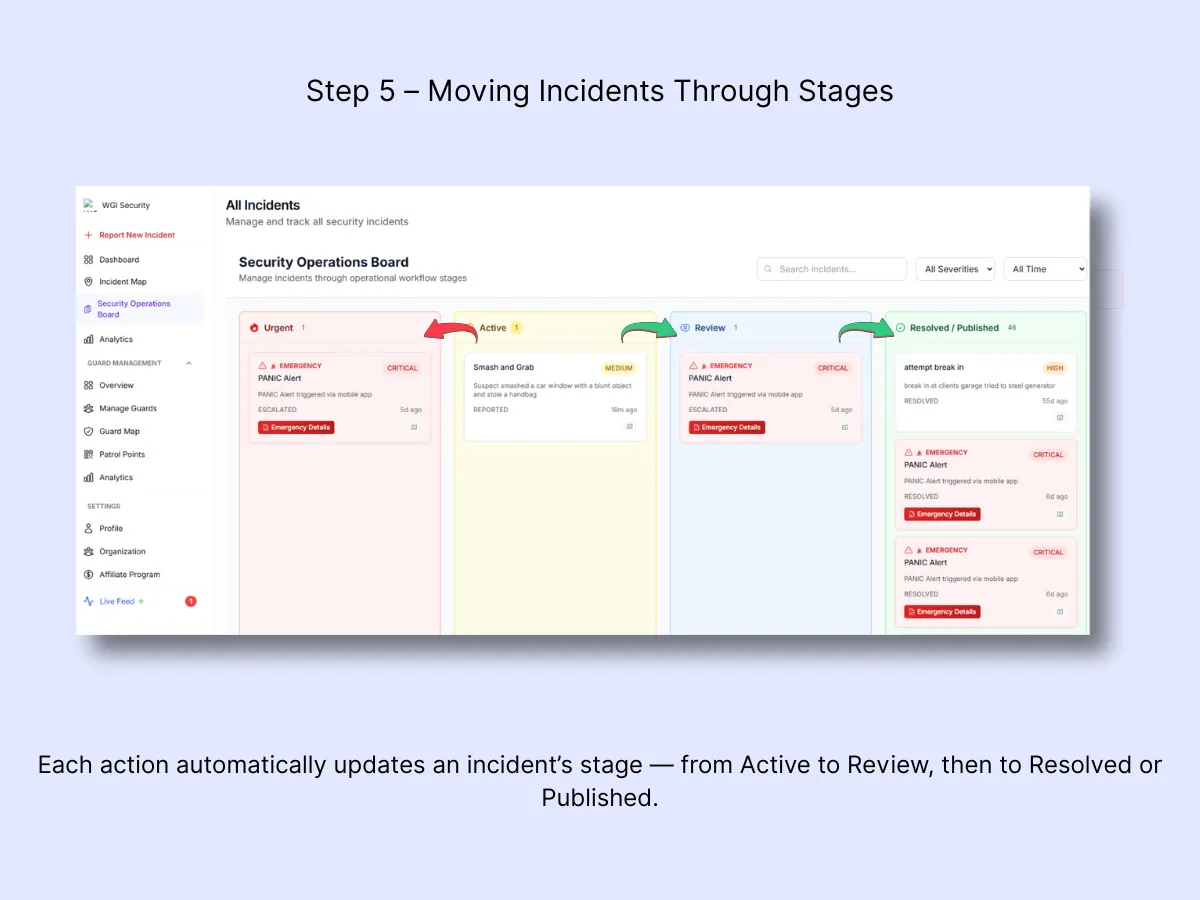
5. Moving Incidents Through Stages
Actions automatically transition incidents between columns:
- Escalate → Urgent
- Keep Working → Active
- Send to Review → Review
- Mark Resolved / Publish → Resolved / Published
6. Typical Workflow Example
- Panic Alert arrives in Urgent. Admin opens Emergency Details → checks the guard's device battery and GPS accuracy.
- Admin uses Map or Navigate to Location to dispatch the nearest guard.
- Once the situation is contained, the incident is moved to Review for verification.
- Final notes are added and the admin clicks Mark Resolved.
- If the client needs to be informed, clicking Publish moves the card to Resolved / Published.

Tip: Leave the Security Operations Board open during shifts to track real-time activity. It offers the most complete picture of ongoing events, pending items, and anything requiring escalation.
Related Solutions
- Real-Time Incident & Emergency Response — the full incident workflow from alert to resolution
- Control Room Dashboard — the live command screen that complements the operations board
- Client Portal & Mobile App — where published incidents appear for your clients