Admin Manual - Managing Profile Settings
Overview
- Personal Information: Contains your name, date of birth, and contact details used for identification and communication purposes.
- Physical Address: Records your home or workplace address, utilized for dispatch accuracy and service delivery.
- Emergency Contacts: Connects designated individuals who should be alerted during an emergency.
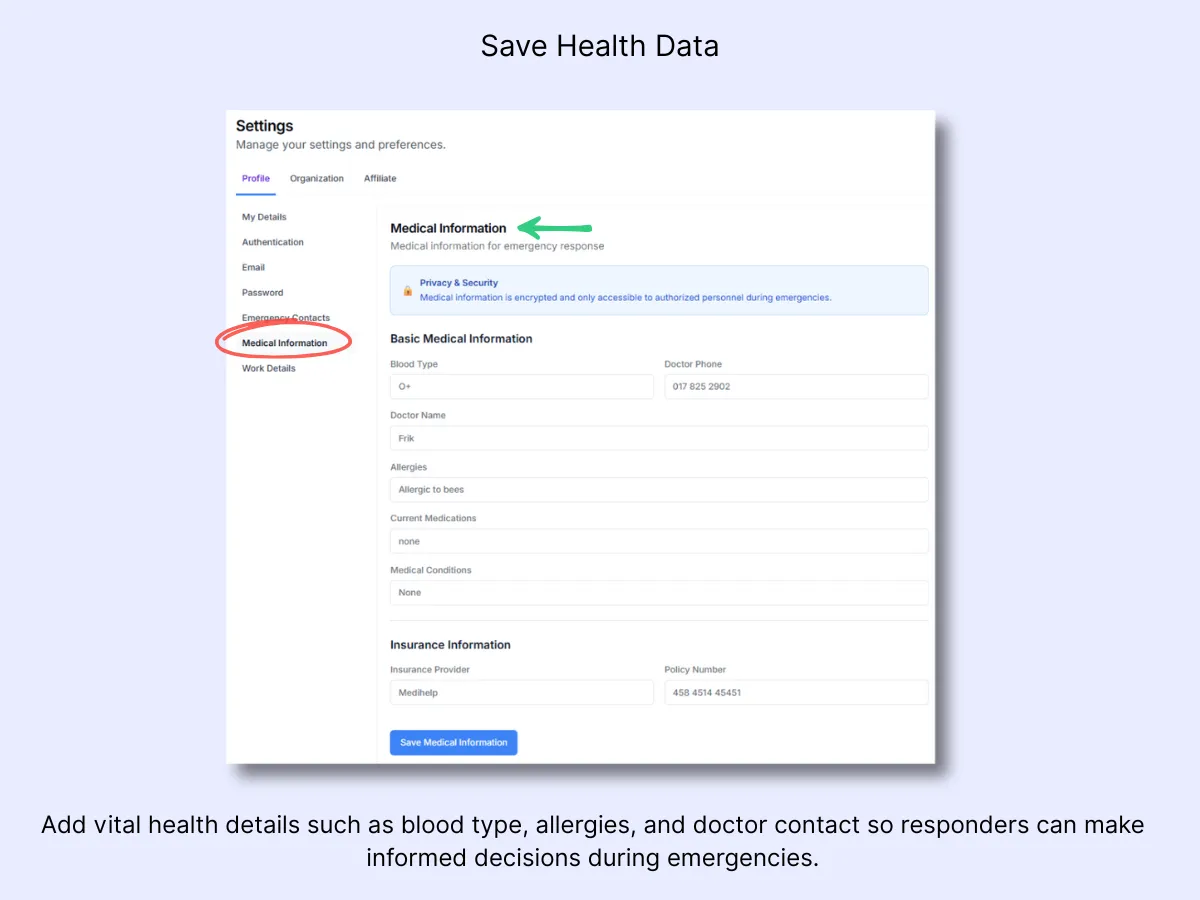
- Medical Information: Captures essential health data such as blood type, allergies, and physician contact information.
- Guard Operations: Enables you to begin or conclude a patrol shift and control live location tracking.
- Privacy & Security: Outlines how your data is encrypted and only shared for emergency and operational purposes.
Use Case
Profile Settings are relied upon by guards, admins, and clients to maintain accurate emergency and contact records. Guards and clients update their personal details and address so the control room can dispatch assistance to the correct location.
Admins depend on this data to verify identities, reach personnel, or confirm compliance details. During an active panic alert, the system automatically populates the Emergency Alert Details window with these records, giving responders instant visibility into who triggered the alert, their current position, and any medical considerations that could impact the response.
Step-by-Step Instructions
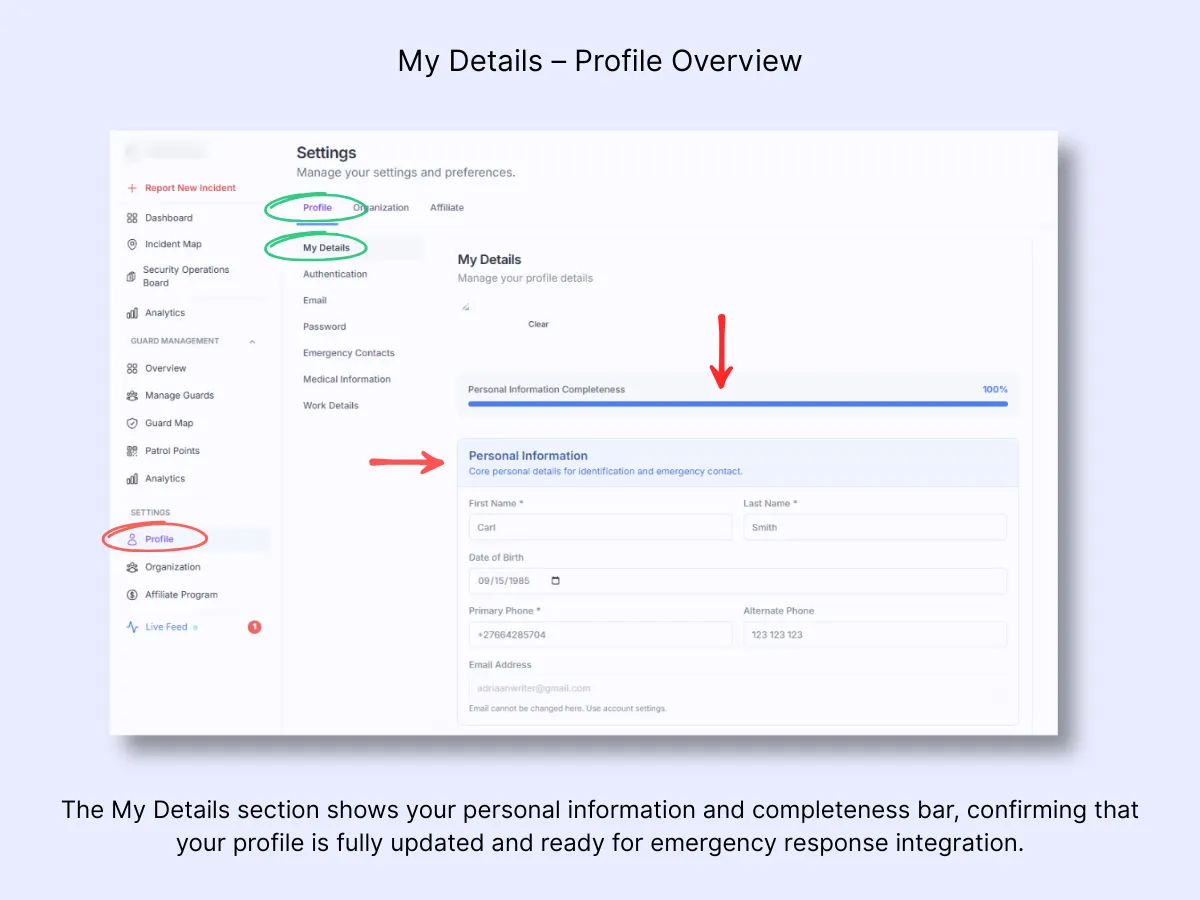
Step 1 – Open Profile Settings
Using the sidebar, navigate to Settings → Profile → My Details. This page allows you to review and modify your personal information, contact details, and overall profile completeness. The blue progress bar at the top indicates how much of your profile is filled in. Ensure it remains at 100% so your data stays fully synchronized with emergency and dispatch systems.
Step 2 – Manage Authentication Settings
Choose Authentication under the Profile tab to configure how your account is connected and secured. Here you can review linked accounts, attach new providers, or activate Multi-Factor Authentication (MFA) for added protection. MFA introduces an extra verification step via SMS, safeguarding your account even if your password becomes compromised.

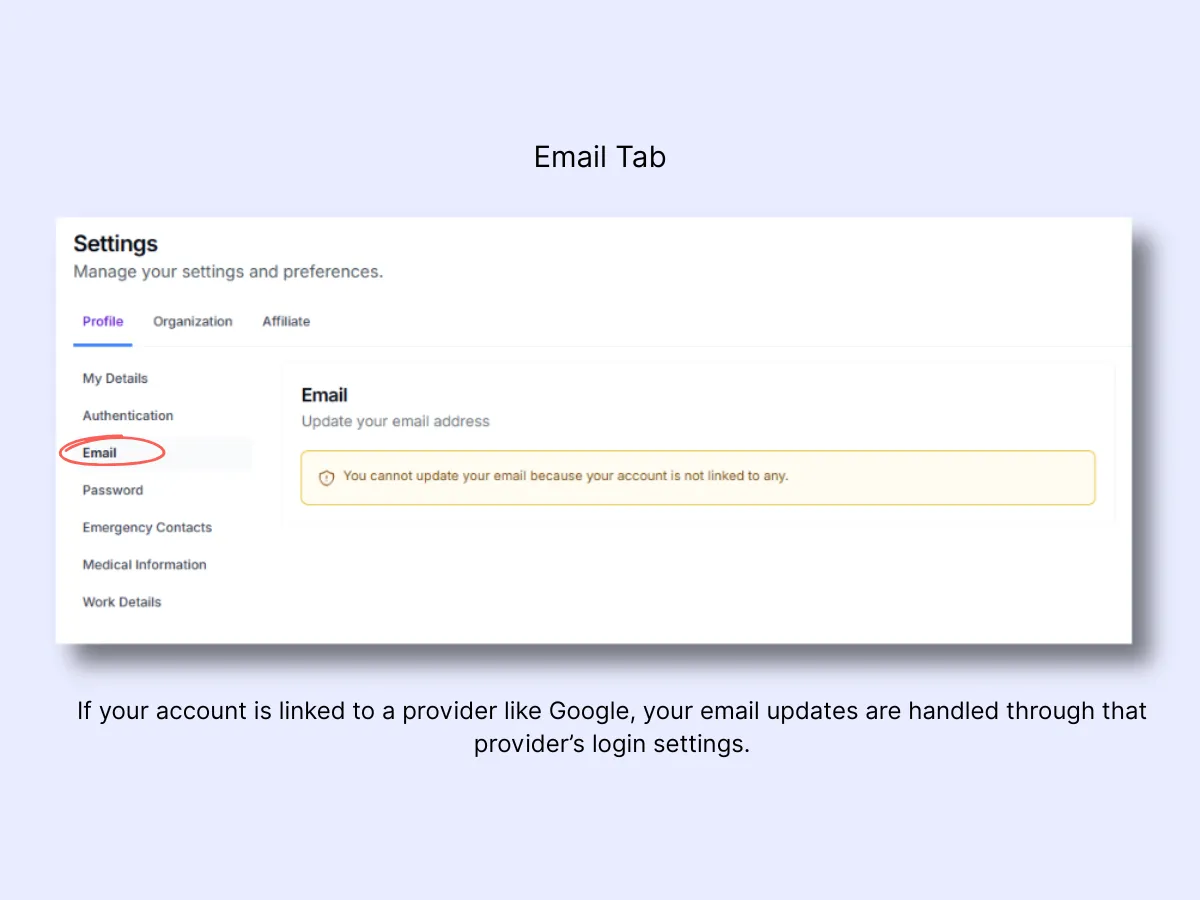
Step 3 – Update Email Settings
Choose Email under the Profile menu to check your registered email address. If your account is connected through a provider such as Google, email modifications are handled through that provider rather than within MyProtektor directly. The notice displayed here confirms that email changes cannot be made inside the platform unless the account is a standalone registration.
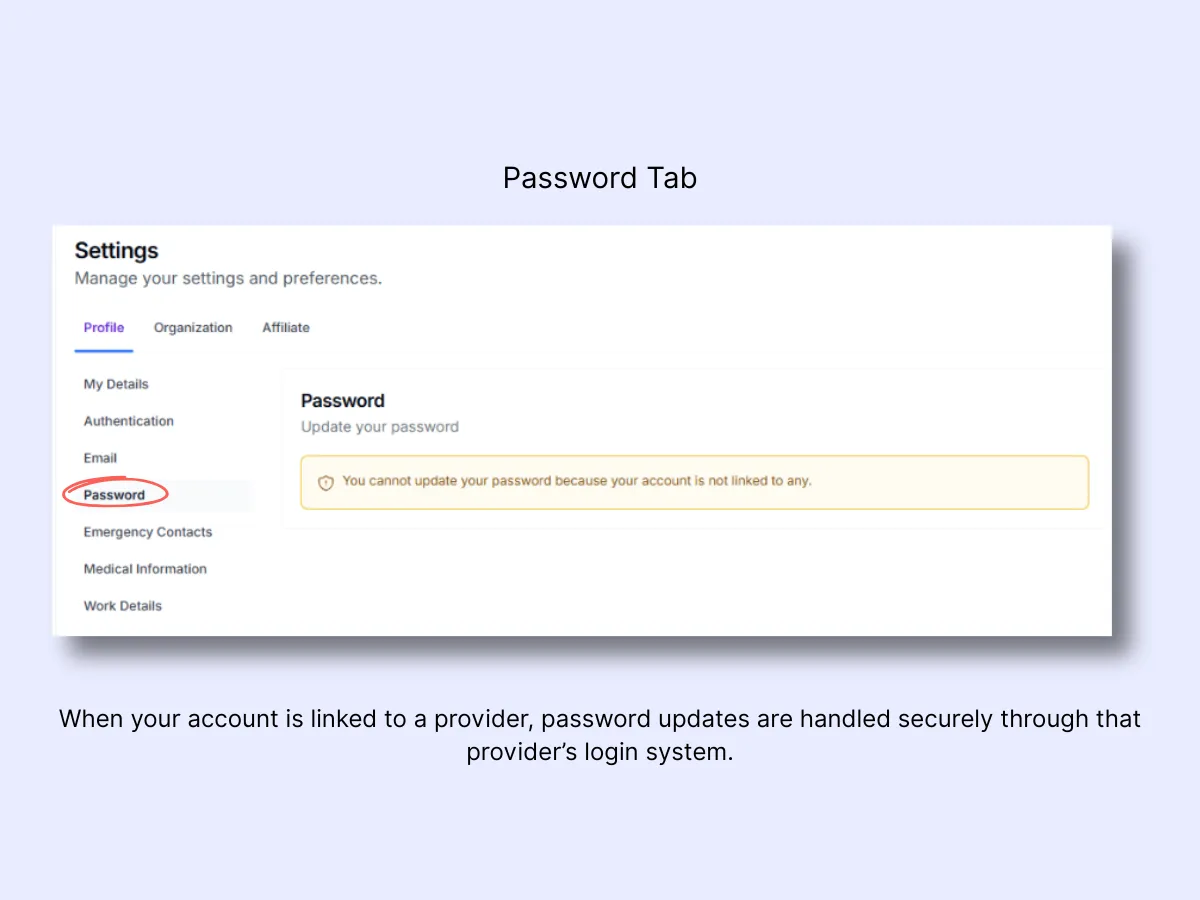
Step 4 – Manage Password Settings
Choose Password under the Profile menu to check your account's password management options. When your account is linked through a third-party provider such as Google, password resets must be performed through that provider. The yellow notice confirms that direct password changes are not available within MyProtektor for provider-linked accounts.
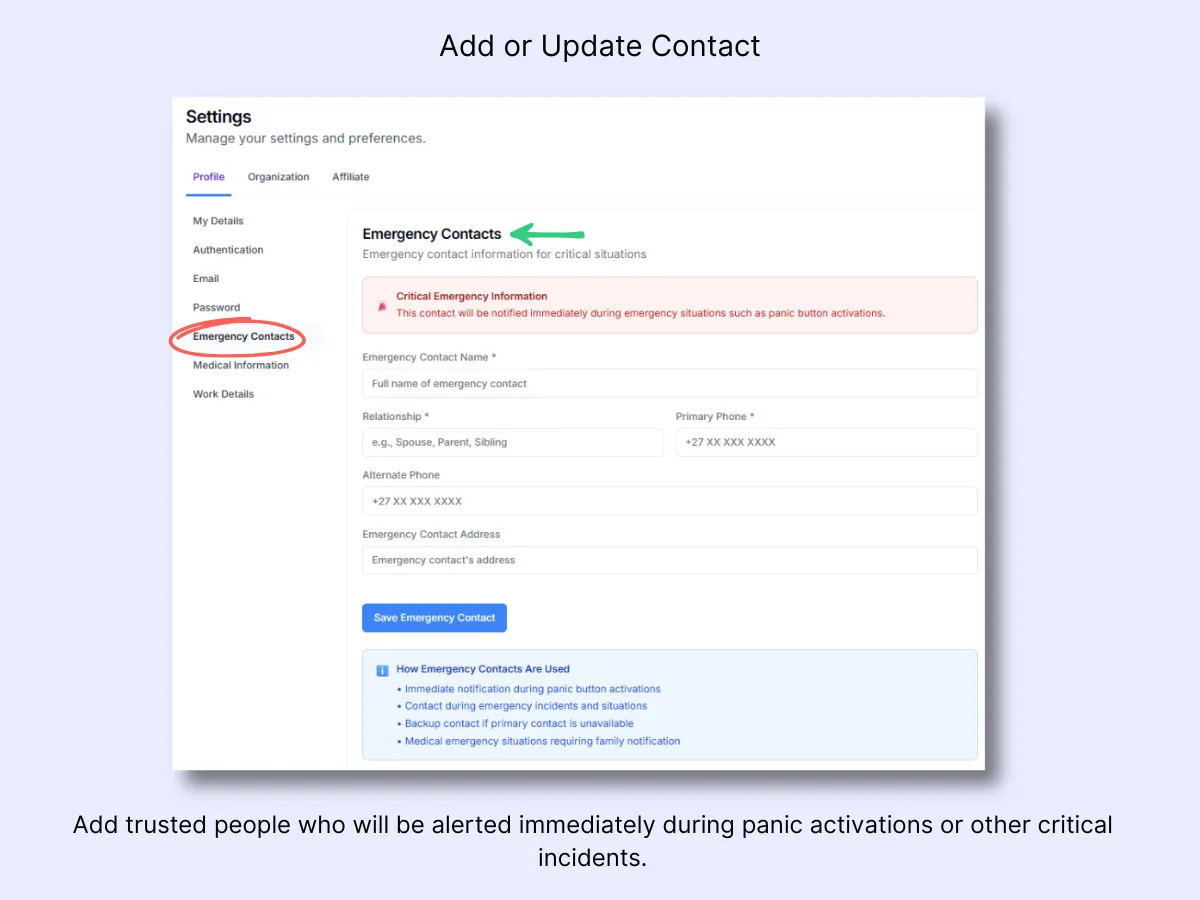
Step 5 – Add or Update Emergency Contacts
Navigate to Emergency Contacts under the Profile menu to designate someone who should be notified in the event of a panic alert or serious incident. Provide the contact's full name, relationship, phone number, and address. This individual will receive an immediate notification if you trigger the panic button or encounter an emergency while on duty. Verify that all phone numbers are accurate and current before saving.
Step 6 – Add or Update Medical Information
Access Medical Information under the Profile menu to enter key health details that support emergency responders. Provide your blood type, physician's contact information, allergies, medical conditions, and insurance provider. This data is displayed immediately on the Emergency Alert Details screen when a panic button is activated, enabling responders to act with speed and confidence.
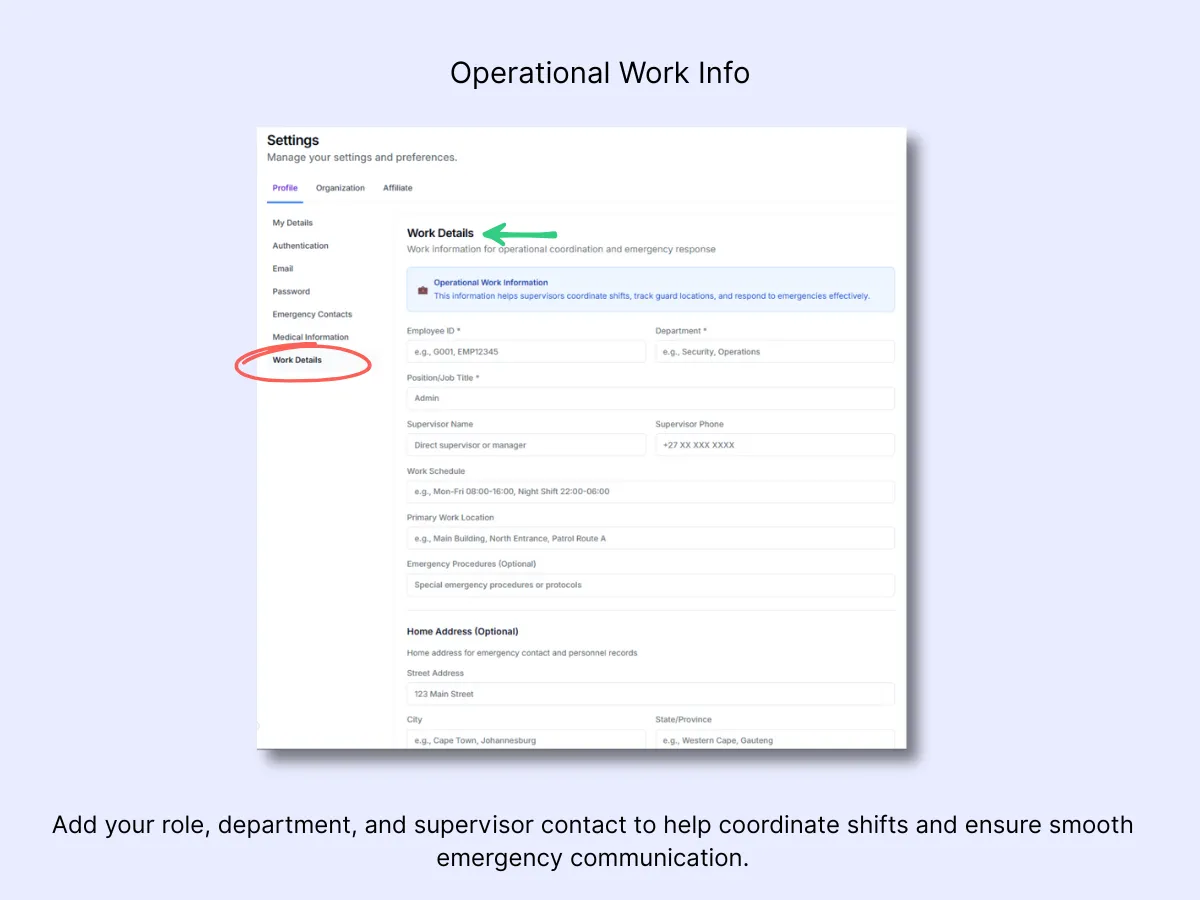
Step 7 – Complete Work Details
Navigate to Work Details under the Profile menu to provide your role, department, and shift information. Include your employee ID, supervisor contact, and regular work schedule. This data helps your organization coordinate shifts, monitor duty locations, and manage emergency responses with greater efficiency. You may also add special emergency procedures or your home address if required for personnel records.
Workflow Example
- A new guard signs into the MyProtektor mobile app and fills out their profile with personal, address, and medical information.
- A private client follows the same process on their mobile profile, providing emergency contacts and health data for rapid response.
- Admins can review and verify these records through the web dashboard, confirming that all user profiles are correct and synchronized.
- When either a guard or a client activates the panic button, their saved information appears instantly in the Emergency Alert Details panel.
- Control room staff can then identify who triggered the alert, view their location, and access relevant medical data, enabling an immediate and well-informed response.
Related Solutions
- Mobile App with Panic Alerts — how profile data powers emergency alerts
- Role-Based Access Control — manage who can view and edit profile data across your organization