Patrol Points - QR Checkpoints for Guard Patrols
Available when the patrolManagement feature is enabled. Admin+ users manage QR checkpoints on the web; Guard+ users scan them in the mobile app.
Getting Started
Open Operations > Sites, choose the site you want to manage, then open the site's Patrol section.
The current Patrol area is site-based. Inside that section, you work across three views:
- Live Monitoring - shows real-time patrol activity, check-ins, and alert state for that site
- Map - shows patrol points on the site map
- Manage Points - where you create folders and QR codes
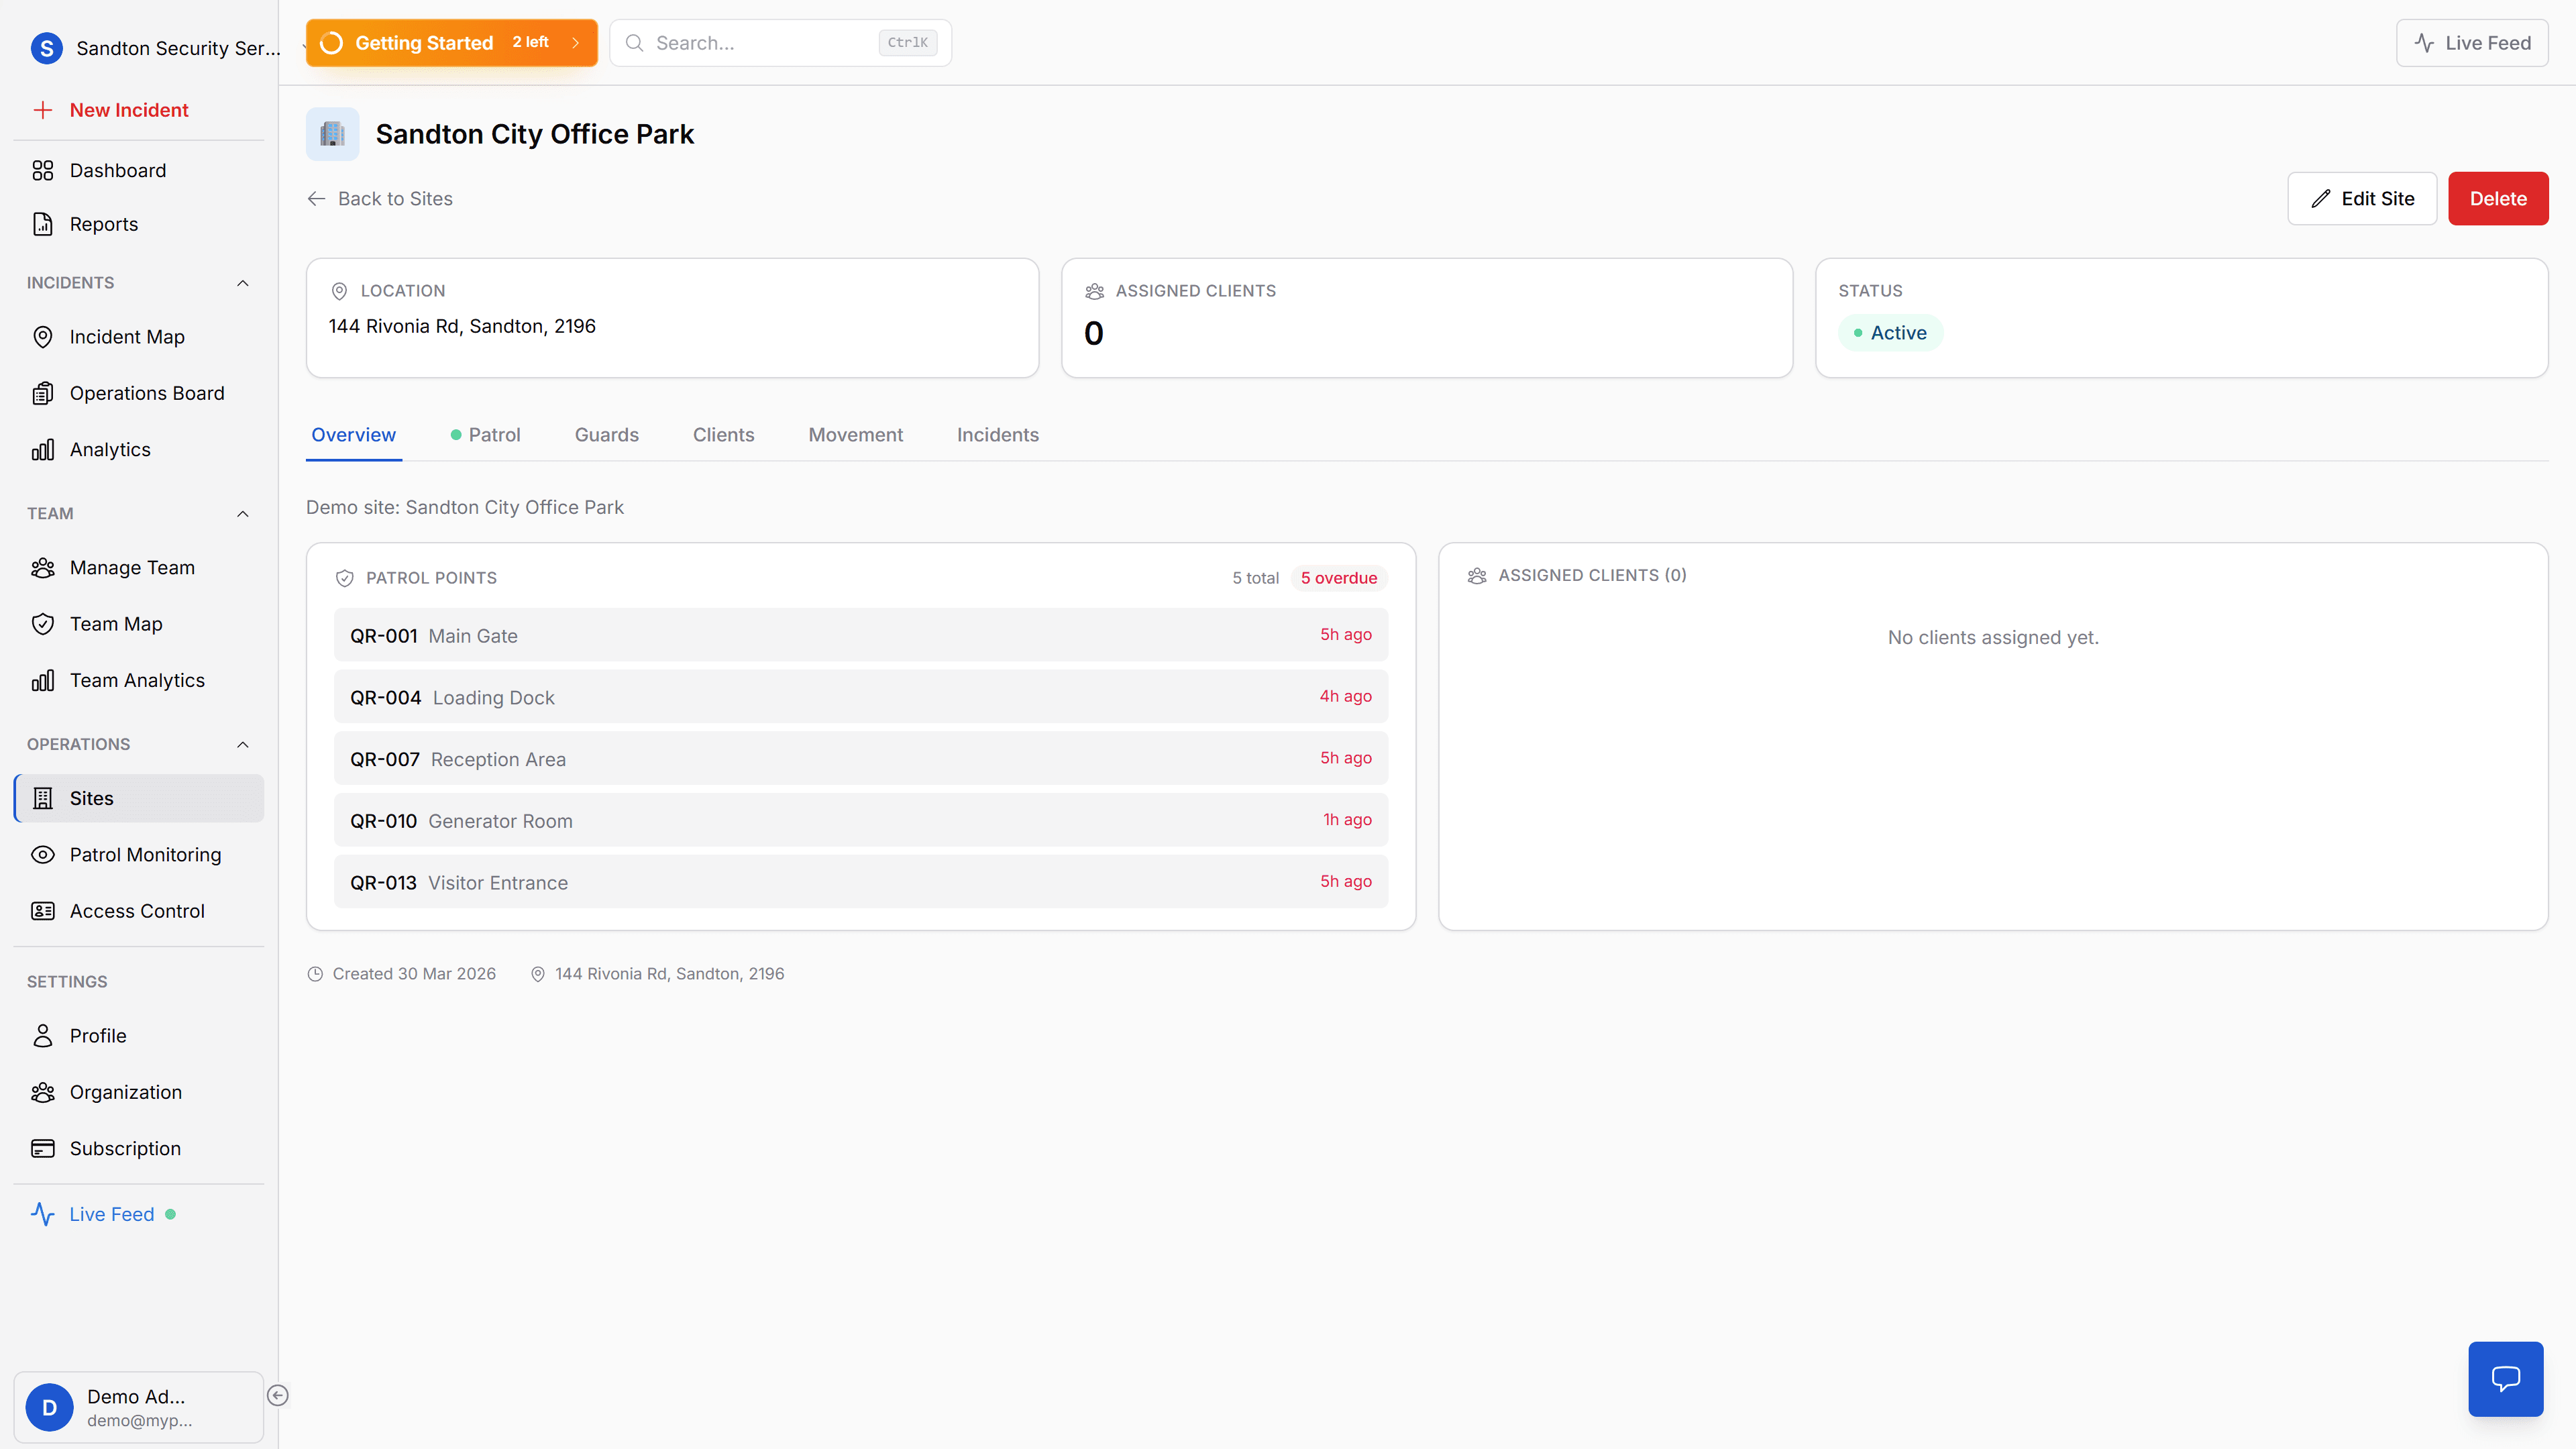
You will usually start on Live Monitoring. That view shows:
- Check-ins Today: Total number of QR scans recorded since midnight.
- Active Points: How many patrol checkpoints are currently enabled.
- System Status: Shows Online when the patrol tracking service is running.
- Patrol Points Status (right panel): A list of all patrol points with their name, check frequency, and priority level.
If the system shows Online and your active points count is correct, everything is working.
 Click to expand
Scroll down to the bottom of this screen to find the System Alerts section. This area flags any missed or overdue patrol scans. If everything is on schedule, it displays No Active Alerts with a green confirmation.
 Click to expand
Setting Up Folders
Folders group your patrol points by site, building, or area. Before creating QR codes, set up at least one folder.
Open the Manage Points view at the top of the Patrol section. This view shows all existing folders, the total number of QR codes, active points, and daily check-ins. The New Folder and New QR Code buttons are in the top right.
 Click to expand
How to create a folder
- Click the New Folder button (top right).
- Enter a Folder Name. Pick something that clearly identifies the location. Examples:
Sandton Office ParkWarehouse B - Night RouteRetail Center Main Building
- Optionally add a Description to explain what this folder contains. Example:
All ground-floor entry and exit points. - Click Create Folder.
The folder appears in the QR Code Organization list on the left. You can create as many folders as you need. Subfolders are also supported for complex sites.
 Click to expand
Naming tips:
- Use the actual property or client name so every team member recognizes it.
- Add a route description if guards patrol multiple routes at the same site (e.g.,
Warehouse B - Perimeter RouteandWarehouse B - Interior Route).
Creating QR Codes
Each QR code is tied to a physical location. When a guard scans it, the system records who scanned, when, and where.
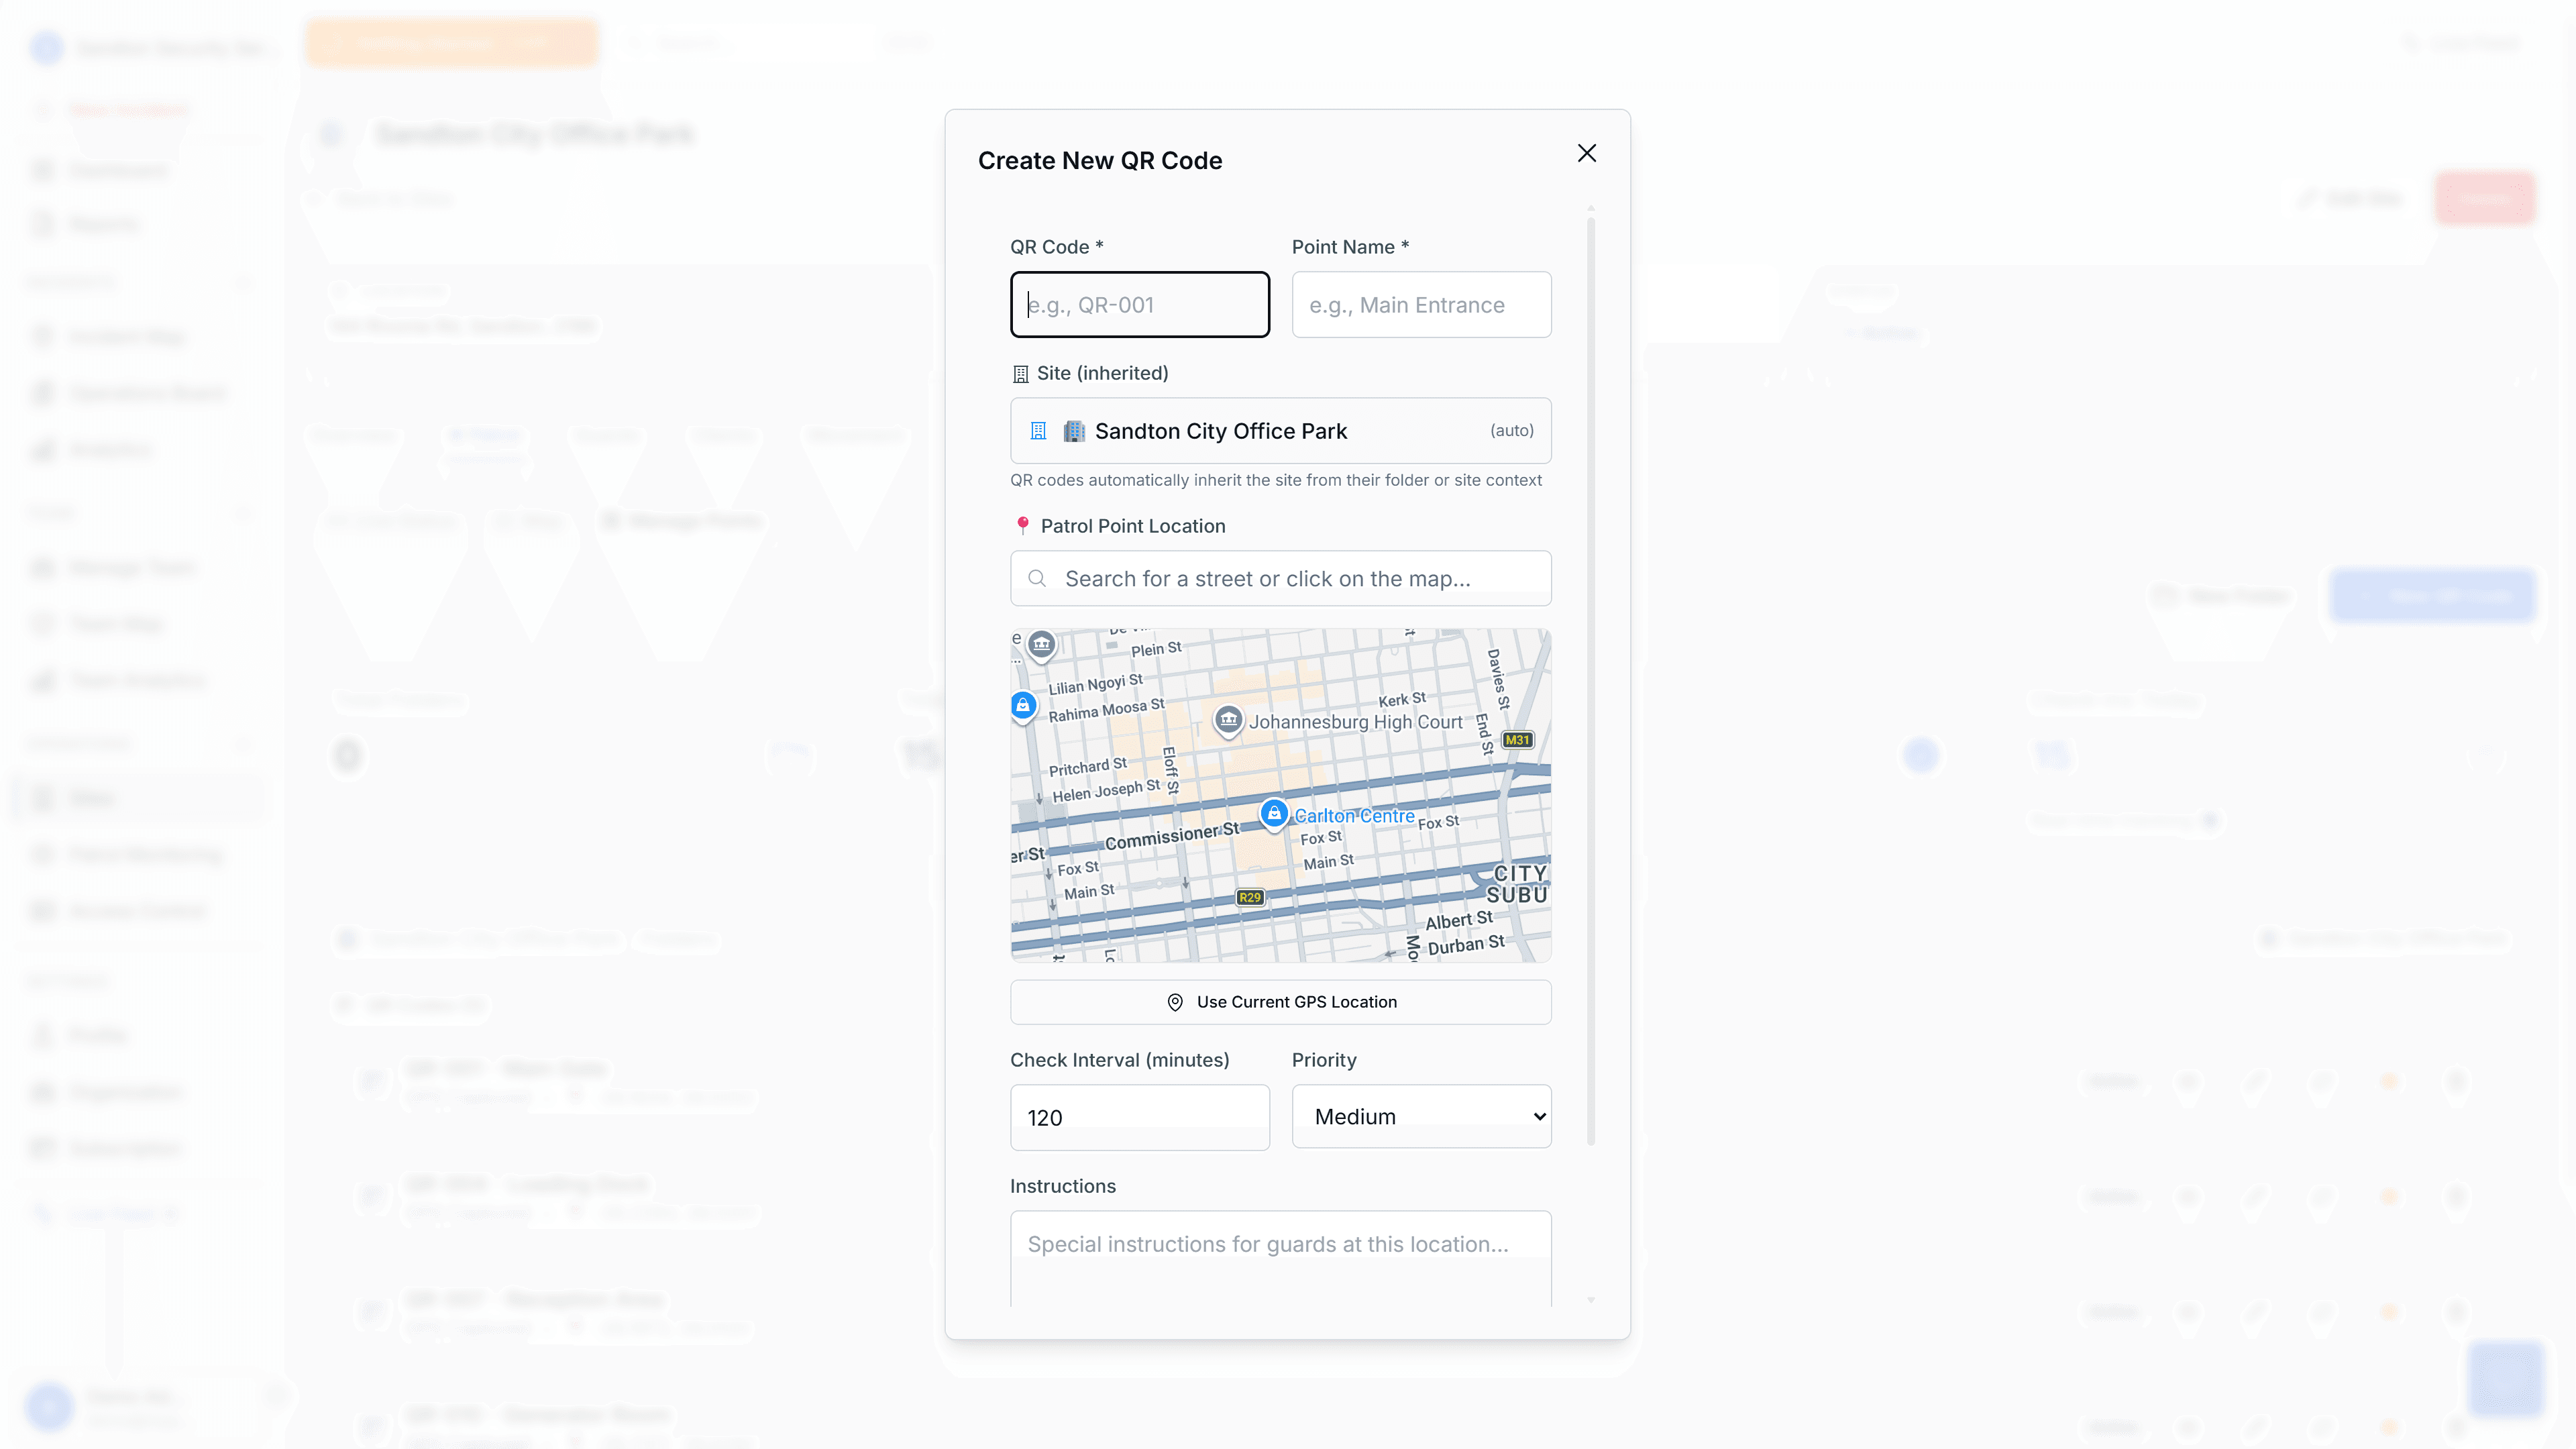
How to create a QR code
- Stay on Manage Points.
- Click New QR Code.
- Fill in the following fields:
| Field | What to enter | Example |
|---|---|---|
| QR Code | A unique ID for this checkpoint | QR-001 |
| Point Name | The location name as guards know it | Main Gate |
| Check Interval (minutes) | How often a guard must scan this point | 60 (once per hour) |
| Priority | How important this checkpoint is | Critical for main entrances, Low for interior hallways |
| Instructions | Notes the guard sees after scanning | Check that boom gate is secured and visitor log is signed |
- Click Create QR Code.
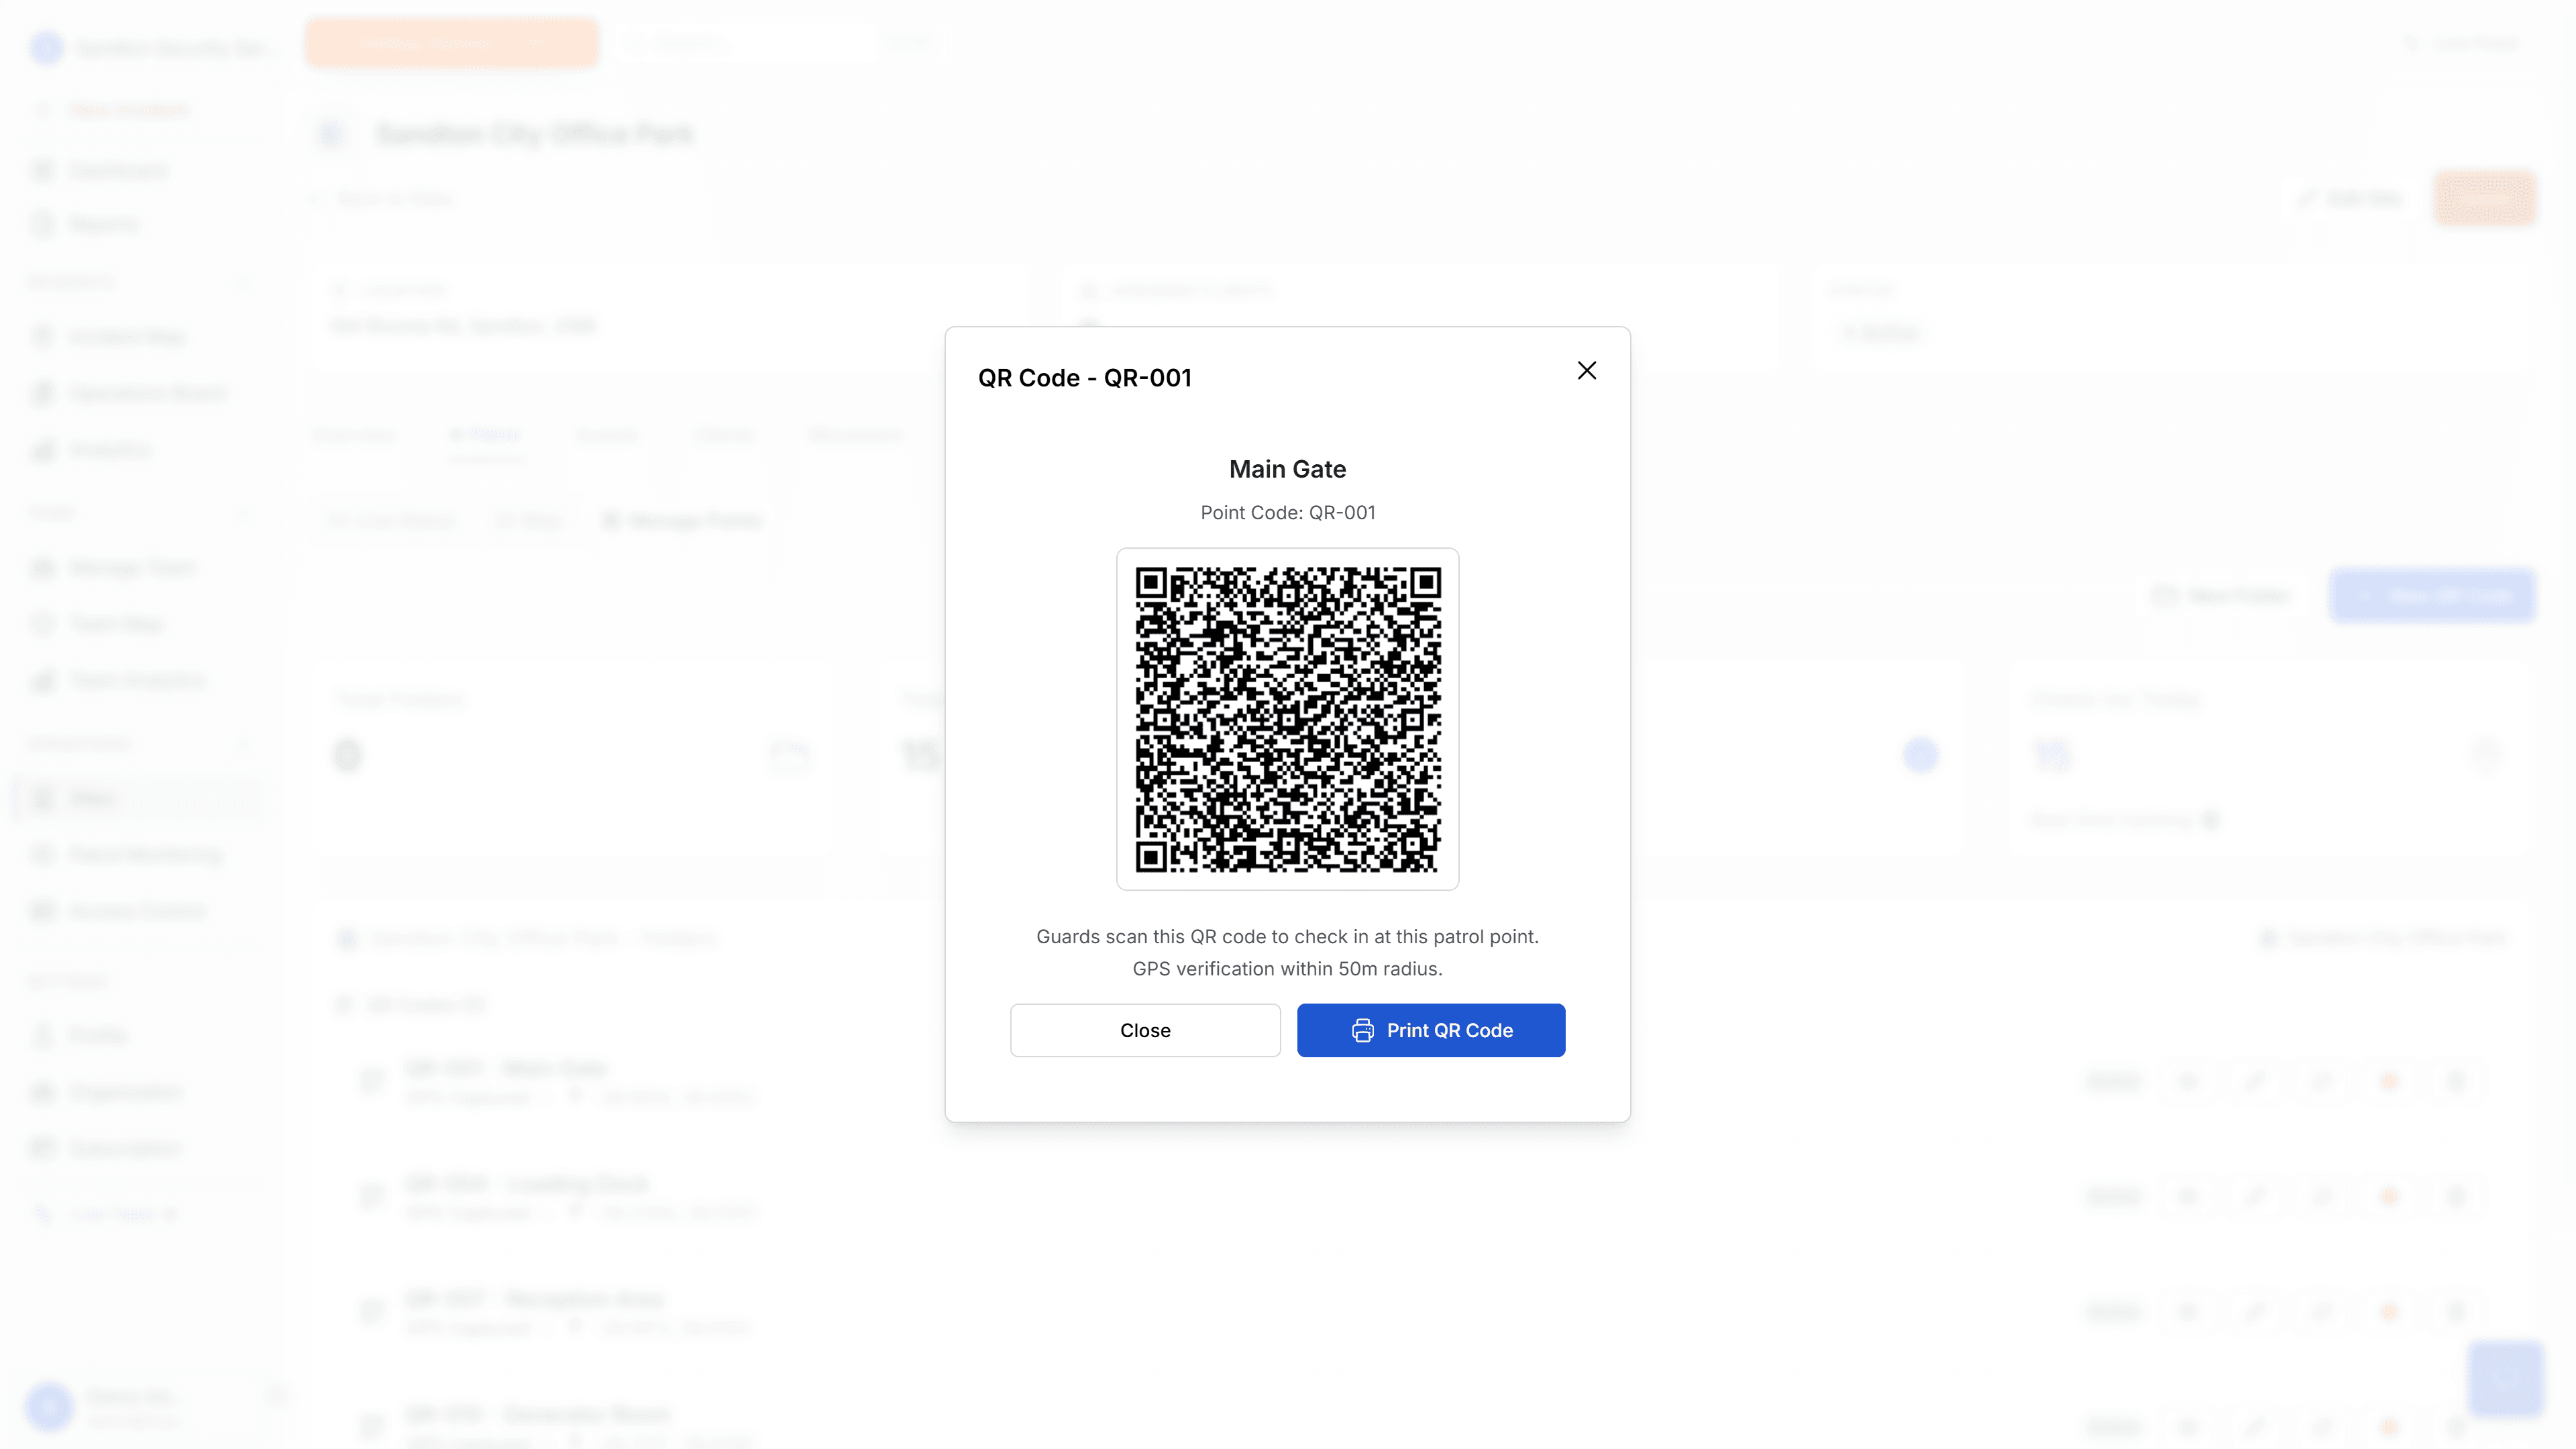
Click to expandAfter creating the QR code
A popup appears showing the QR code image, point name, and point code. From here:
- Click Print QR Code to print it.
- Mount the printed code at the physical location (the gate, door, or checkpoint).
- The first time a guard scans this code on site, the system automatically records the GPS coordinates for that checkpoint.
 Click to expand
Printing and mounting recommendations
- Print size: Standard A4 page. The QR code only needs to be a few centimeters wide to scan reliably.
- Outdoor locations: Use laminated paper or a clear plastic sleeve to protect the code from rain and dust.
- High-durability option: Take the file to a print shop and ask for vinyl sticker paper or rigid plastic signage. These last months outdoors.
- Mounting: Double-sided tape, adhesive spray, or zip ties (for laminated codes on fences or poles).
- Placement: Eye level, on a clean and visible surface such as a wall, gate post, or door frame.
Monitoring Patrols
Once QR codes are deployed, switch back to Live Monitoring to watch patrol activity in real time.
What to check during a shift:
- Check-ins Today counter: Is the number increasing as guards complete their rounds? If the count stays flat for a long period, a guard may have missed their route.
- Patrol Points Status panel: Each checkpoint shows its last scan time. If a point is overdue (past its check interval), it turns orange or red.
- Recent Activity feed: The five most recent scans appear here with the guard name, point name, and timestamp.
- System Alerts section: Missed or overdue scans are flagged here. If this section shows alerts, investigate immediately by contacting the guard or checking their status on the Team Map.
Exporting patrol data:
Patrol logs and patrol analytics are handled through the reporting flow. For a broader organization-wide live view, use Operations > Patrol Monitoring.
Troubleshooting
A guard says the QR code will not scan.
- Confirm the printed code is not damaged, faded, or covered by dirt or condensation.
- Ask the guard to clean their phone camera lens.
- Check if the guard has the latest version of the MyProtektor mobile app installed.
- If the code is physically damaged, reprint it from the Manage Points tab (click the QR code to reopen the preview).
System Status shows Offline.
- This means the patrol tracking service is temporarily unavailable. Scans made during this time are queued on the mobile app and submitted once the connection is restored. No data is lost.
A checkpoint shows as overdue but the guard says they scanned it.
- Check the guard's phone for network issues. Scans require a data connection to upload.
- Verify the guard scanned the correct QR code (not one from a different checkpoint).
- Look at the Recent Activity feed to see if the scan appears with a delay.
GPS coordinates are missing for a checkpoint.
- The GPS is recorded on the first scan at the physical location. If the guard scanned the code indoors with GPS disabled, the coordinates may not have been captured. Ask the guard to scan again while standing at the checkpoint with GPS enabled.
What Patrol Points Do NOT Do
- No GPS validation against checkpoint position -- GPS is captured per scan for the audit trail, but the system does not check whether the guard is physically near the checkpoint
- No auto-routing -- there is no automatic route planning between patrol points; guards follow their assigned route independently
- No geofence enforcement -- there are no geofence boundaries around checkpoints
Related Solutions
- Patrol Management Software -- QR-verified patrols with GPS proof and compliance reporting
- Access Control & Visitor Verification -- QR-based entry management using the same scanning system