Admin Manual – Guard Management
Overview
From this dashboard you can:
- Add or modify guard information such as department, schedule, and assigned supervisor
- Monitor guard activity, on-duty status, and device battery level
- Narrow the roster by role or specialization
- Maintain skill records and upload certification documents for compliance purposes
- Confirm guards hold the proper qualifications before assigning them to patrols or incidents
Use Case
Guard Management helps admins to:
- Maintain an up-to-date and accurate guard roster
- Confirm that guards carry valid certifications before dispatching them to assignments
- Locate guards with particular skills like First Aid, Crowd Control, or Access Control
- Address missing information or expired certificates
- Review work activity and adjust assignments directly from the dashboard
Step-by-Step Instructions
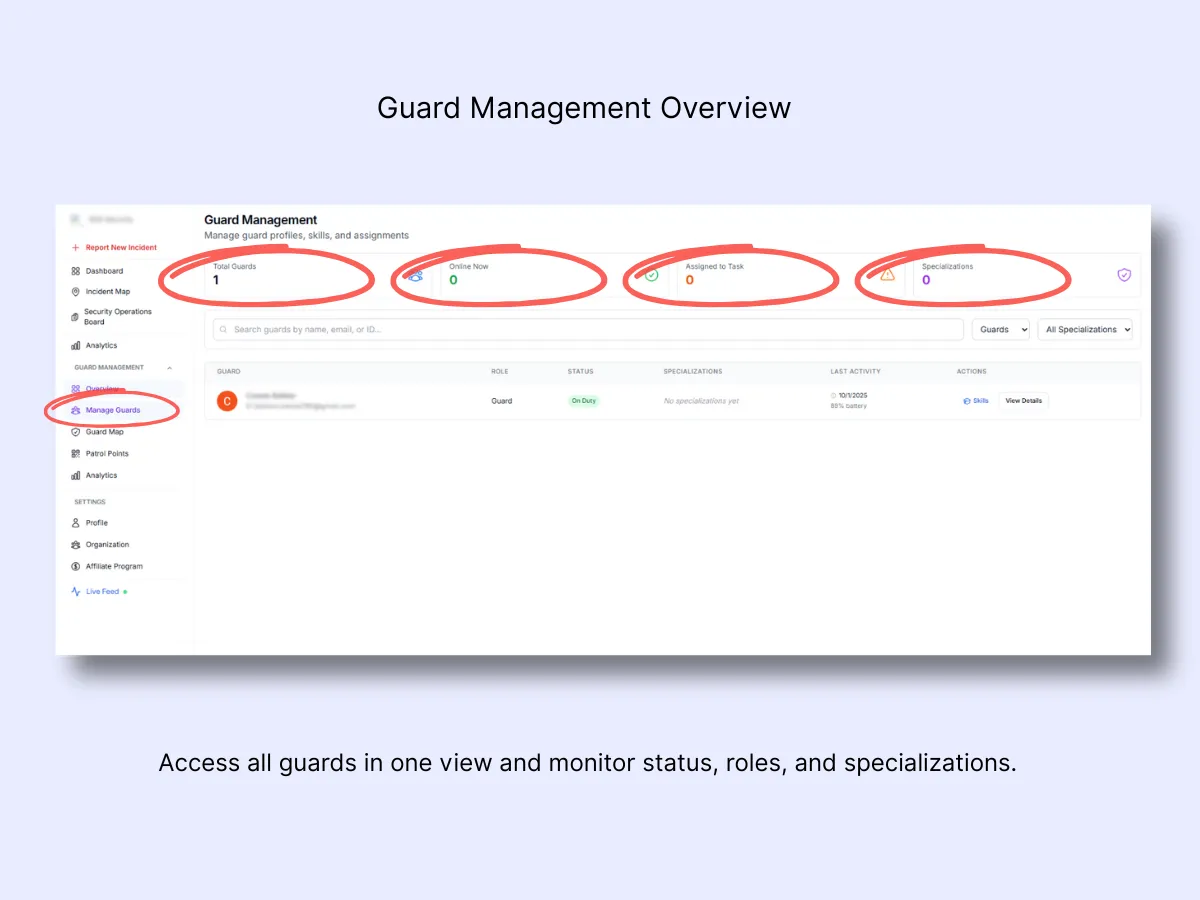
Step 1 – Open Guard Management
Path: Sidebar → Guard Management → Manage Guards
This page presents all guards in your organization along with their status (On Duty / Offline), specializations, and last recorded activity. You can search for guards, open individual profiles, and update their records from here.
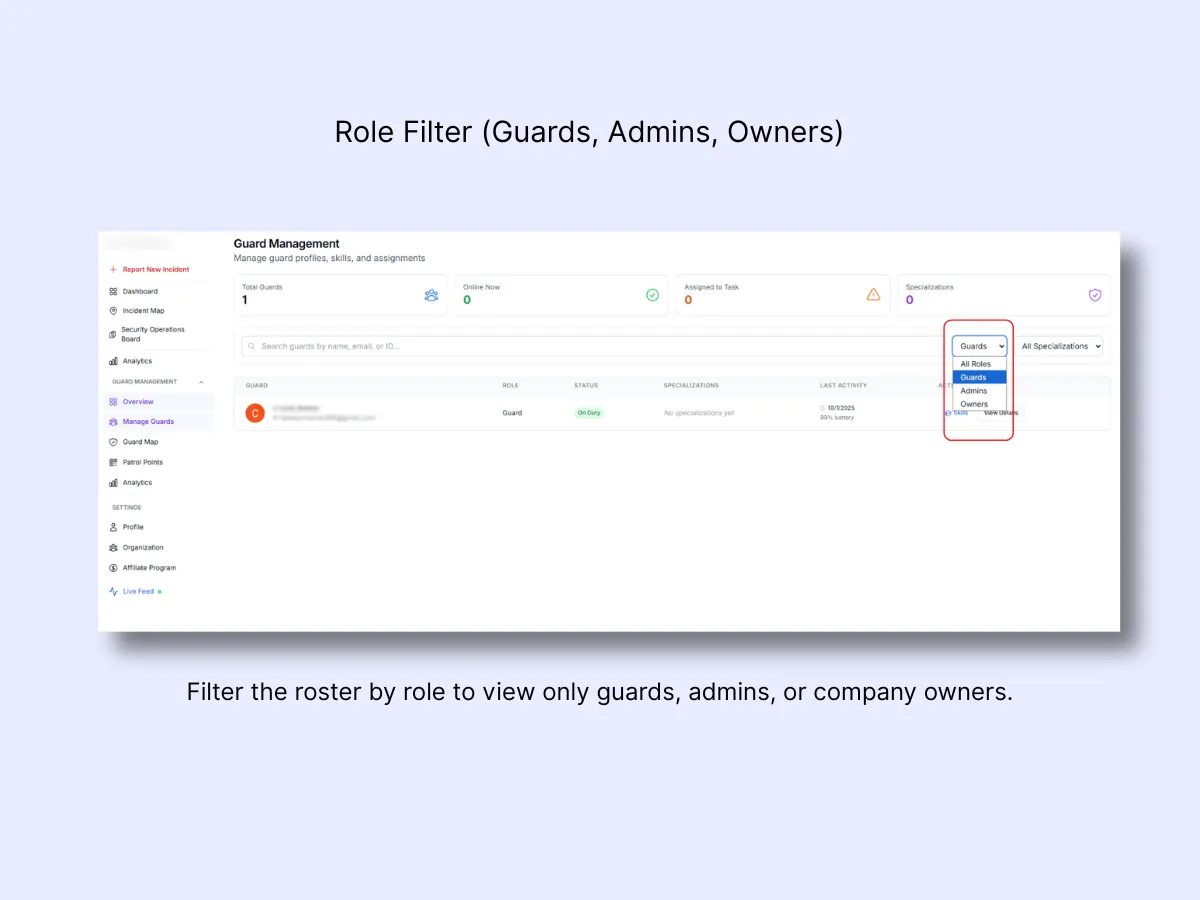
Step 2 – Filter Guards by Role
Apply the Role filter to refine the displayed roster. The available options are:
- Guards: Active personnel in the field
- Admins: Office-based users with management permissions
- Owners: Company owners with full system access
Click the dropdown beside the search bar and pick the role you wish to display.
Step 3 – Filter Guards by Specialization
To locate guards who possess a specific skill, open the All Specializations dropdown. The available specializations are:
- Crowd Control
- K9 Handler
- Firearms
- First Aid
- Fire Safety
- Access Control
- Surveillance
- VIP Protection
- Event Security
- Patrol

Step 4 – View Guard Profile Details
Click View Details beside a guard's name to open their profile. Inside you will find:
- Employment Details: Job role, department, supervisor
- Operational Information: Email and on-duty status
- Home Address: Stored for emergency contact purposes
- Recent Activity: Logged patrols or activities

Step 5 – Edit Guard Profile
To enter or update work-related details:
- Click Edit Profile within the guard's detail view.
- Complete or revise the following fields:
- Employee ID
- Department (e.g., Security, Operations)
- Position/Job Title
- Supervisor name and phone
- Work schedule
- Primary work location
- Emergency procedures
- Home address (optional)
- Click Save Work Details to confirm the changes.
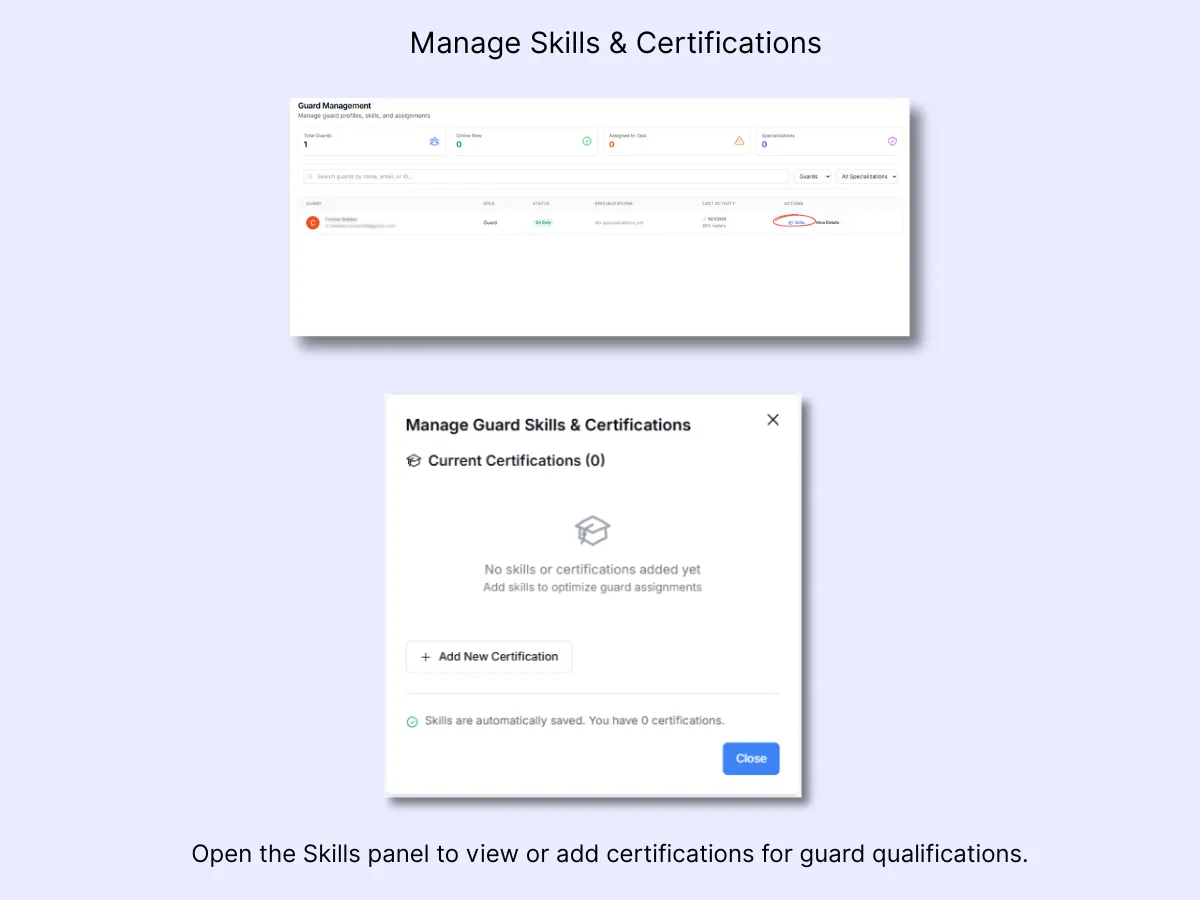
Step 6 – Manage Guard Skills & Certifications
Click Manage Skills within the guard's profile to open the certifications panel. This area lists every skill and certification currently on file for the guard. If nothing has been recorded yet, it will display "No skills or certifications added yet."
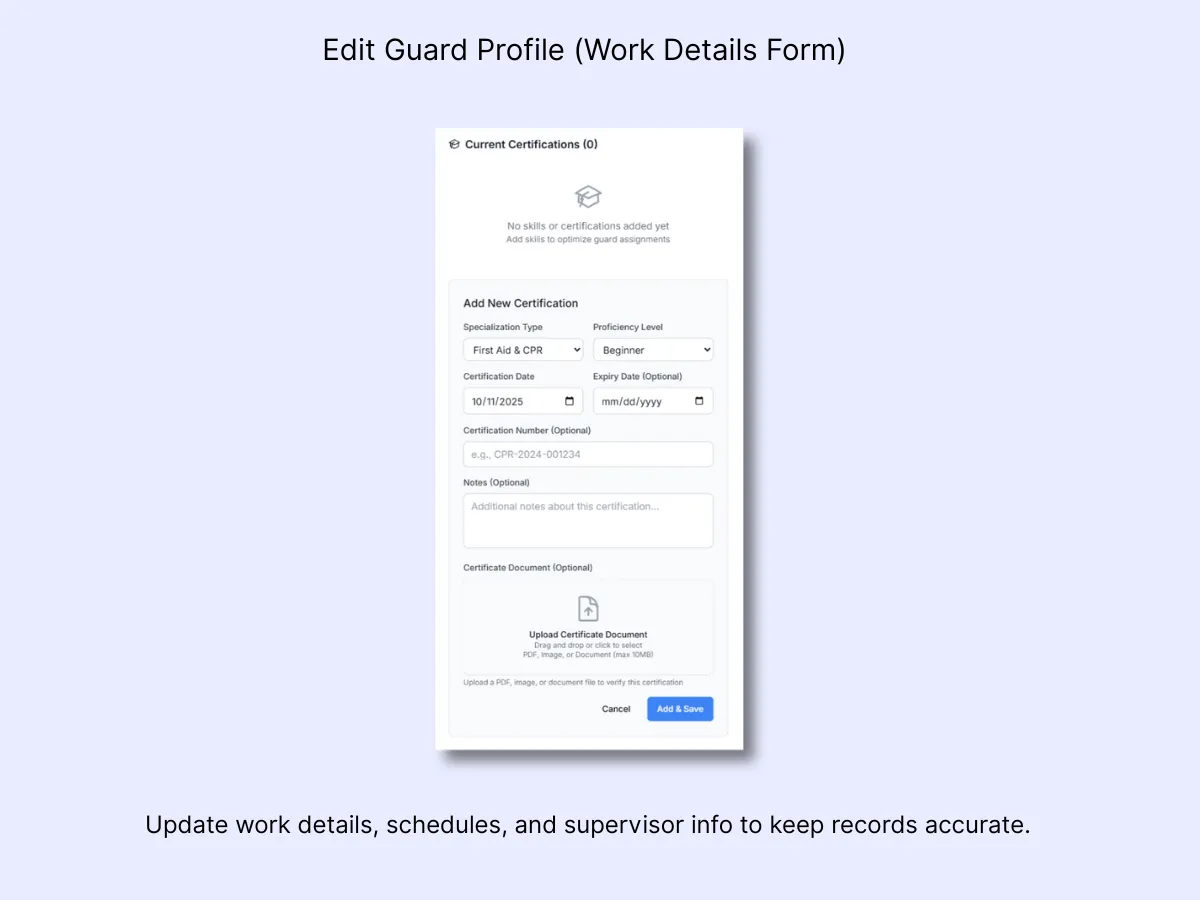
Step 7 – Add a New Certification
Click Add New Certification to register a new qualification. Provide the following information:
- Specialization Type (e.g., First Aid & CPR)
- Proficiency Level (Beginner / Intermediate / Advanced)
- Certification Date
- Expiry Date (Optional)
- Certification Number (Optional)
- Notes (Optional)
- Upload Certificate Document (PDF, Image, or DOC up to 10MB)
Then click Add & Save. The new certification will now be visible in the list.
Step 8 – Verify Saved Certifications
After being added, certifications appear automatically under Current Certifications. You can modify or remove them at any time. These records are referenced when filtering guards by specialization and when assigning personnel to tasks.
Workflow Example
Scenario: Onboarding a New Guard: Navigate to Manage Guards under Guard Management.
- Click Add Guard (if available) or verify that the new guard shows up in your roster.
- Open Edit Profile to enter work details, supervisor information, and schedule.
- Click Manage Skills to record First Aid and PSIRA certifications.
- Upload supporting documents and set the appropriate expiry dates.
- Save your changes and return to the main roster.
- Apply filters to confirm the guard is listed under the correct Role and Specialization.
- Assign the guard to a site through the Map View or Incident Dashboard when ready.
Result: The guard is fully set up, visible in the system, and certified for deployment.
Related Solutions
- Best Security Guard Management Software — complete platform overview for managing your team
- Role-Based Access Control — control who sees what across your organization
- Shift and Duty Management — tie guard profiles to live duty status